M5ez 2.0: testers wanted...
-
@r_255 I don't know about this mqtt implementation, but in general, one would use
_brightness.toInt()or_brightness.toFloat()to turn variable_brightnessfrom a String into a number. Hope that helps. -
void menu_brightness_slider(){
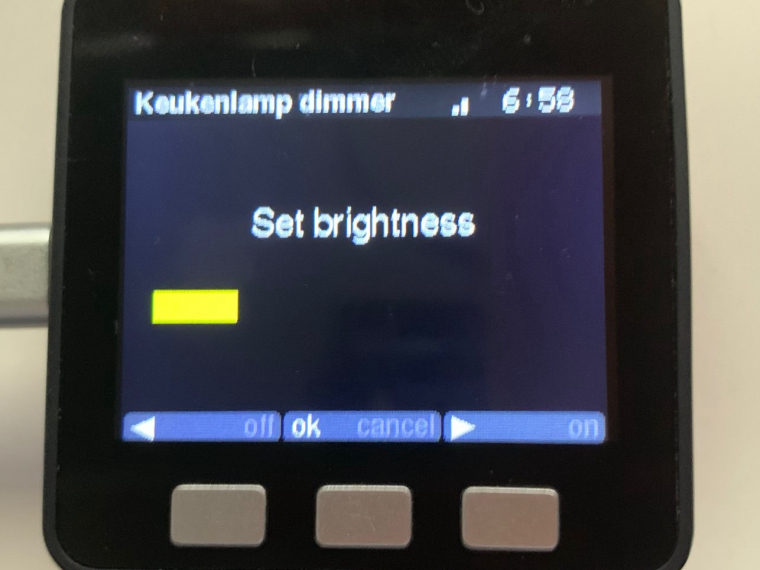
  ezProgressBar bl ("Keukenlamp dimmer", "Set brightness", "left#off#ok#up#right#on");
            while (true) {

              String b = ez.buttons.poll();

              if (b == "right" && brightness <= 90) brightness += 10;
              if (!brightness) brightness = 100;
              if (b == "left" && brightness > 11) brightness -= 10;
              if (b == "left" && brightness < 11) brightness = 0.01;
              bl.value((float)(brightness));
              if (b == "ok") break;
              if (b == "off")brightness = 0.01;
              if (b == "on")brightness = 100;
              if (b == "up") loop();
}

// Prepare a JSON payload string
  String payload = "";
  payload += "{";
  payload += "\"command\": \"switchlight\", \"idx\": 143, \"switchcmd\": \"Set Level\", \"level\":";
  payload += brightness;
  payload += "}";

  // Send payload
  char attributes[100];
  payload.toCharArray( attributes, 100 );
  client.publish( "domoticz/in", attributes );
  Serial.println( attributes );
  menu_brightness_slider();
}
This works ! :O)

Now a long press set on or off or back to menu
-

Well slowly i am getting somewhere
-
@r_255 Cool! :)
-
Strang bug appears in this code
#include <M5ez.h>
#include <ezTime.h>
#include "images.h"
#define MAIN_DECLARED
void setup() {
#include <themes/default.h>
#include <themes/dark.h>
ezt::setDebug(INFO);
ez.begin();
}
void loop() {
ezMenu images;
images.imgBackground(TFT_BLACK);
images.imgFromTop(40);
images.imgCaptionColor(TFT_WHITE);
images.addItem(sysinfo_jpg, "Photo Turntable", sysInfo);
images.run();
}The title "Photo Turntable" get printed on the top and the bottom of the screen.
(sorry no picture) -
@ajb2k3 You're absolutely right: the feature to be able to change the captions of text menus while the menu is active had introduced this error on some image menu displays. Fixed in version 2.0.1 which I just released. :)
-
@rop
I was messing with the image menu trying to create an image screen. -
@ajb2k3 Single image screens can be done with a one item menu. I was thinking of also adding the possibility of providing an image to
ez.msgBox, but probably the 1-item menu approach is more flexible because it allows for a caption. -
You could also add just an image to your mez screen.like this. But it has to be on a sd card.
M5.Lcd.drawJpgFile(SD, "/c50x50_light_icon_off.jpg",20, 75, 50, 50);
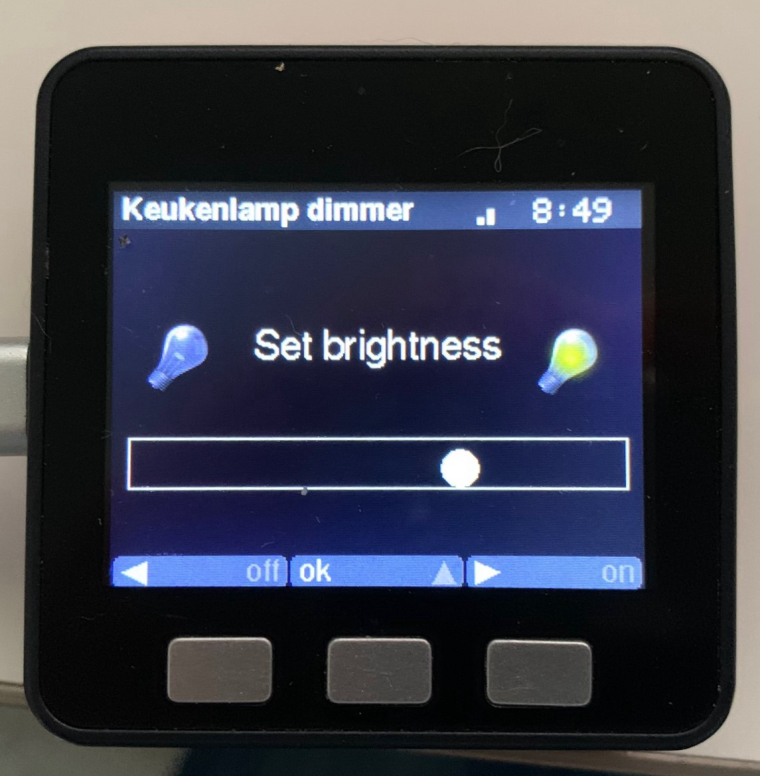
Below is my experiment to make my own dynamic slider to get familiar with the arduino ide and m5ez
The end goal is to read the value from mqtt and set the slider to the known value of the dimmer and set itint bar_position = 25 ; // START POSTITION ( TO DO : READ THIS VALUE FROM MQTT AND SET IT )Drop the line above in top of the m5ez to set the start position of the bar. Paste the below code in de the m5ez demo add to the main menu.
void menu_brightness_slider(){

  int Bar_step_amount = 10;  // bar is devided in XX steps ( for on/of set to 1 )
  int Bar_lenght = 275; // Length of the slider bar
  int Bar_height = 28;  // Height of the slider bar
  int Bar_steps = Bar_lenght / Bar_step_amount;


  int Top_hLine_Start_X = 22; // X postion on screen from the left side
  int Top_hLine_Start_Y = 150; // Y-postition on screen from the top
  int Top_hLine_End_X = Bar_lenght + Top_hLine_Start_X ; // X End line postion on screen from the left side
  int Top_hLine_End_Y = Top_hLine_Start_Y;

  int Bot_hLine_Start_X = Top_hLine_Start_X;
  int Bot_hLine_Start_Y = Top_hLine_Start_Y + Bar_height ;
  int Bot_hLine_End_X = Top_hLine_Start_X + Bar_lenght ;
  int Bot_hLine_End_Y = Bar_height + Top_hLine_End_Y ;

  int Start_Point = Top_hLine_Start_X;
  int End_Point = Top_hLine_Start_X + Bar_lenght;
  int But_Radius = 10; // size of the slider indicator

  int mid_button = Top_hLine_Start_Y + ( Bar_height/2 );
  int bar_start_position = Top_hLine_Start_X + ( But_Radius ) ;
  int bar_end_position = Top_hLine_End_X - ( But_Radius ) ;

  ezProgressBar bl ("Keukenlamp dimmer", " brightness " , "left# #ok#up#right# ");
      while (true) {
            String b = ez.buttons.poll();

              //Draw lamp images and load them from sd root
              M5.Lcd.drawJpgFile(SD, "/c50x50_light_icon_off.jpg",20, 75, 50, 50);
              M5.Lcd.drawJpgFile(SD, "/c50x50_light_icon_on.jpg",255, 77, 50, 50);

              // conversion to 0 -- 100 to set dimmer
              int dimmer_value = (( bar_position / Bar_steps ) * 10 );
              Serial.println( dimmer_value );

              // slider indicator draw
              M5.Lcd.fillCircle((  bar_position ) , mid_button, But_Radius, 0xffff); // draw a white dot based on the _bar_y value
              M5.Lcd.fillCircle(( bar_position - Bar_steps ), mid_button, But_Radius, 0x0000); // draw a blck dot based on the _bar_y value
              M5.Lcd.fillCircle(( bar_position + Bar_steps ) , mid_button, But_Radius, 0x0000); // draw a blck dot based on the _bar_y value

              // Draw the rectangle for the slider
              M5.Lcd.drawLine(Top_hLine_Start_X, Top_hLine_Start_Y, Top_hLine_End_X, Top_hLine_End_Y, 0xffff); //Draw a line from the point X0 and Y0 to the point X1 and Y1 with a color from 0 to 65535
              //M5.Lcd.drawLine((Top_hLine_Start_X - 1), (Top_hLine_Start_Y  + 2), Top_hLine_End_X - 1 , Top_hLine_End_Y + 2 , 0x0ff0); //shade line
              M5.Lcd.drawLine(Bot_hLine_Start_X, Bot_hLine_Start_Y, Bot_hLine_End_X, Bot_hLine_End_Y, 0xffff); //Draw a second hor line and draw 2 vertical lines between them in the next two lines of code
              M5.Lcd.drawLine(Top_hLine_Start_X, Top_hLine_Start_Y, Bot_hLine_Start_X, Bot_hLine_Start_Y, 0xffff); //Left vert drawn line based on top and bot line
              M5.Lcd.drawLine(Top_hLine_End_X, Top_hLine_Start_Y, Bot_hLine_End_X, Bot_hLine_End_Y, 0xffff);//Right vert drawn line based on top and bot line


              /////////////////// Steps right
             if (b == "right" && bar_position <= Bar_lenght ){
                ( bar_position += Bar_steps );
                Serial.println ( bar_position );
                              }

              ////////////////// Steps left

              if (b == "left" && bar_position > Bar_steps) {
                bar_position -= ( Bar_steps );
              Serial.println ( bar_position );
                              }

              if (b == "on") {
              bar_position = Bar_lenght + 25 ;
              }
              if (b == "off"){ bar_position = Top_hLine_Start_X  ;
              }
              if (b == "ok") break;  // Jump out of loop and goto part that posts values to mqtt

              if (b == "up") loop();  // Jump out of loop and goto main menu
// Ok was pressed, and now we calculate the dimmer value, prepare the payload and send it
dimmer_value = (( bar_position / Bar_steps ) * 10 );


// Prepare a JSON payload string
  String payload = "";
  payload += "{";
  payload += "\"command\": \"switchlight\", \"idx\": 143, \"switchcmd\": \"Set Level\", \"level\":";
  payload += dimmer_value;
  payload += "}";


  // Send payload
  char attributes[100];
  payload.toCharArray( attributes, 100 );
  client.publish( "domoticz/in", attributes );
  Serial.println( attributes );
  menu_brightness_slider();// Loop and restart slider
}
Not as dynamic as i wished, but its a start and with some parameter adjustments the slider bar can be converted to any size and even one that looks like a on and off switch, with only 2 positions.
Why not just draw a rectangle instead of 4 lines ? Well the lines could be replaced by bitmaps, so the slider button will run between bitmaps instead of over ( stacked bitmaps give me a kind of interlaced images and looks odd )in this example i convert the slider bar to a scale of 0 - 100 and post in to my domoticz setup thru mqtt ( json formated )
The mqtt part of the code is missing, but thats nothing more than adding the library in the arduino ide and set the parameters.
Next step will be separate the mqtt part and run that on a different core, so connection won't stall over time. -
Having fun with m5ez

Now i am a copy and paste my own code .... coder....
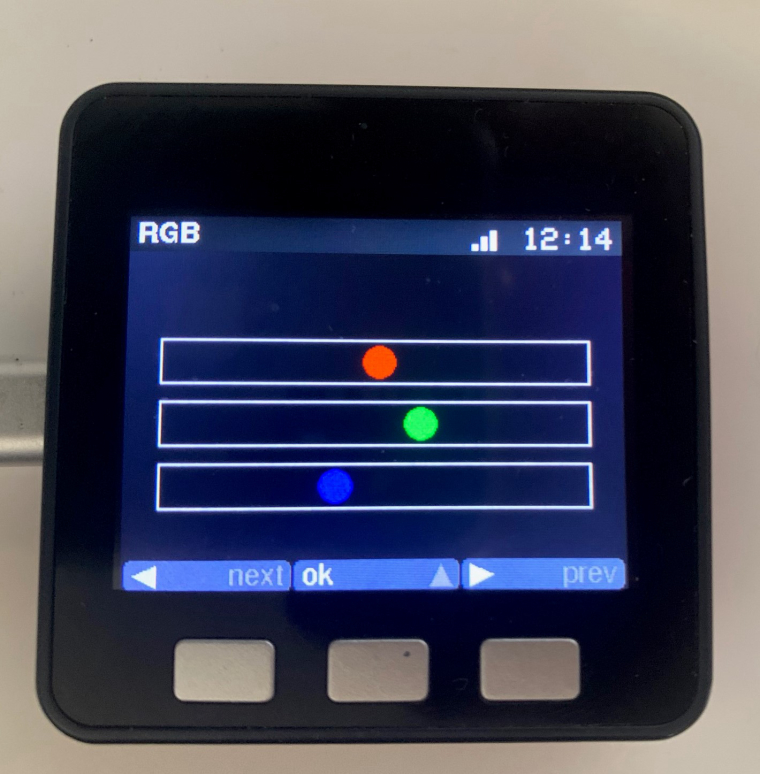
Copied my slider and made a mechanism that selects and sets each slider.
Next and previous makes you jump between each slider, left and right sets the value , ok publishes the value and up gets you back to the main menu.I still have issues to get my values in to m5ez object like the header, text works fine but int is still a issue. Tried to convert them to chars, but failed....
So much to learn at once.