UNITCAM: ArduinoIDE, use many versions of code!


-
Hi, this post is a follow up from a previous post on the subject of using UnitCam with Arduino IDE Programming Framework, in relation to a bug which is found in the current version (2021/NOVEMBER) of the "esp32-camera" library, that causes error in camera devices without PSRAM, including the M5Stack UNITCAM.
To prevent the error, the user can download older versions of the code (esp32-camera), where the bug was not present (in the code).
For example, going back to 2021/FEBRUARY, the "esp32-camera" source code runs without any problem on UNITCAM (also on any other device without PSRAM).In the case of Arduino IDE, we can install the older versions of the whole arduino-esp32 framework, where the esp32-camera module is part of, so, we can install the entire old package and will also get the old camera module inside it...
This post details how to download older versions of the code, and "install" it on the Arduino IDE Programming Framework.
The method described here is a MANUAL procedure, to download code and place then inside the Arduino framework, "by hand", so to speak... so you learn the details on how to "manually place code inside Arduino IDE"...
*I also did a text/post on how to install old versions of esp32-camera, for projects using Espressif ESP-IDF Programming Framework here:
[https://community.m5stack.com/topic/3788/unitcam-idf-use-many-versions-of-code]This little tutorial DOES NOT COVER the use of the IDE Board Manager, to install software libraries, in which you can choose predefined versions releases of the code and then click in "install version xx.xx.xx", so that the IDE automatically download all respective packages and places them inside the Arduino IDE Environment...
If the IDE Board Manager method already satisfy your needs, you may not need to learn the present tutorial...
So, the tutorial presented here is a "manual" way to download and "install" software inside de IDE, giving the user a little bit of knowledge and control on how to choose different versions of software components (more about it at the end of this text)...This little tutorial uses RaspberryPI RaspOS GNU/Linux (based on Debian GNU/LINUX) to explain the steps, the overral concepts and procedures are the same for other environments as well.
STEP 1: Run Arduino IDE in Portable Mode
First, before talking about ESP32 software library, it is a good idea to explain how to run Arduino IDE in Portable Mode.
When running in Portable Mode, all the configurations and software components downloaded goes to inside the main Arduino IDE folder, into another folder called "portable". In this way, this installation (folder) is COMPLETELLY INDEPENDENT, holding everything inside the main folder. As a result it is possible to have MULTIPLES installations with different software components and configurations, and there will be NO CONFLICTS between them!
The portable mode is also good because it provides a way for the user to carry to folder to any computer (of the same platform) and run it without any need of normal installation process, this is the meaning of the "portable" in portable-mode.For our little tutorial, the Portable Mode help us to have a complete insulated and independent installation to use different versions of software components, or to do tests, etc... so that your own Arduino IDE installation will NOT BE AFFECTED!
It is very simple to run Arduino IDE in Portable Mode, we just need to create an empty folder with the name "portable", inside de main Arduino IDE folder.
For example: after downloading the file "arduino-1.8.13-linuxarm.tar.xz" from the Arduino website, and extracting it with the command (linux):
tar -xf arduino-1.8.13-linuxarm.tar.xzThe software is extracted and place inside a new folder "arduino-1.8.13".
-rw-r--r--  1 pi pi 96485196 Jun 16  2020 arduino-1.8.13-linuxarm.tar.xz
drwxr-xr-x 10 pi pi     4096 Jun 16  2020 arduino-1.8.13
Inside the folder "arduino-1.8.13", we have the following:
arduino-1.8.13
├── examples/
├── hardware/
├── java/
├── lib/
├── libraries/
├── reference/
├── tools/
├── tools-builder/
├── arduino*
├── arduino-builder*
├── arduino-linux-setup.sh*
├── install.sh*
├── revisions.txt
└── uninstall.sh*
"/" is folder, "*" is executable
Now, lets go inside this main folder and create the "portable" folder:
#go inside the folder
cd arduino-1.8.13/
#create a new empty folder with the name "portable"
mkdir portableNow, we have the following:
arduino-1.8.13
├── examples/
├── hardware/
├── java/
├── lib/
├── libraries/
├── portable/
├── reference/
├── tools/
├── tools-builder/
├── arduino*
├── arduino-builder*
├── arduino-linux-setup.sh*
├── install.sh*
├── revisions.txt
└── uninstall.sh*
"/" is folder, "*" is executable
Then, if we run the "arduino" executable:
./arduino
we should have Arduino IDE in Portable Mode!
[IDE picture]
Shutdown the IDE, so that we can go to the next step.
This first step, Portable Mode, is not directly related with the use of components in different versions, in fact, IT IS A COMPLETELY EXTRA step here, it is not a necessary step.
The problem is that, we need portable mode, otherwise we will end up creating conflicts (many of them) trying to use Arduino IDE with different versions of software... with Portable Mode, we can have as MANY Arduinos IDEs as we want, all independent from each other, that is the reason we include the instruction here!
STEP 2: Download "arduino-esp32" framework/library and place it inside your custom Arduino IDE folder.
Now lets look again inside the main folder, there is a folder called "hardware"...
arduino-1.8.13
├── hardware/
...
"/" is folder
We will install an older version of the "arduino-esp32" software inside this "hardware" folder...
Before downloading and installing the component, we need to create a new folder inside the "hardware" folder, with the name "espressif".
#enter the folder "hardware"
cd hardware
#create the "espressif" folder
mkdir espressif
We have something like this:
arduino-1.8.13/
└── hardware/
    └── espressif/
We can use either METHOD 1 - git commands, or METHOD 2 - manual zip download.
Use METHOD 1
Git command is needed, if you don't have it installed, need to install:#if you need to install git sudo apt install git #download the current version of the software (latest) git clone https://github.com/espressif/arduino-esp32.git esp32 #enter the "esp32" folder cd esp32 #revert, go back to the version (commit) at 2021/FEB/22 git checkout 560c0f45f58b907f0d699f65408b87fe54650854 #you can find a full list of versions (commits) here: https://github.com/espressif/arduino-esp32/commits/masterOr, use METHOD 2
Using the web browser, go to:[commits URL] https://github.com/espressif/arduino-esp32/commits/master
Choose a version (commit) to download.
For this little tutorial, we choose the 2021/FEB/22 version (commit):[2021/FEB/22 commit URL]
https://github.com/espressif/arduino-esp32/tree/560c0f45f58b907f0d699f65408b87fe54650854Download as zip file and extract it.
Then, create a new folder "esp32" inside the folder "espressif".We need as shown below:
arduino-1.8.13/
└── hardware/
    └── espressif/
        └── esp32/
All the files and folders that was extract from the zip file, need to be placed inside the folder "esp32".
The following is what I do have inside the "esp32":
arduino-1.8.13/hardware/espressif/esp32/
├── boards.txt
├── CMakeLists.txt
├── component.mk
├── cores/
├── docs/
├── Kconfig.projbuild
├── libraries/
├── LICENSE.md
├── Makefile.projbuild
├── package/
├── package.json*
├── platform.txt
├── programmers.txt
├── README.md
├── tools/
└── variants/
Both METHOD 1 and METHOD 2 should have a folder called "tools", inside the folder "esp32", which is inside "espressif", which is inside "hardware".
Like the following:arduino-1.8.13/hardware/espressif/esp32/tools/We need to be inside this "tools" folder to run the following command:
#if you are inside "espressif" folder run:
cd esp32/tools
#or, if you are inside the "esp32" folder, run:
cd tools
#then (when inside the 'tools' folder), run:
python3 get.py
The previous command (python3 get.py) download and extract the tools (compiler, etc), needed to build our sketches into binary form.
We now can go back to main "arduino-1.8.13/" folder and run:
./arduinoIf you are already running the IDE, you need to restart it!
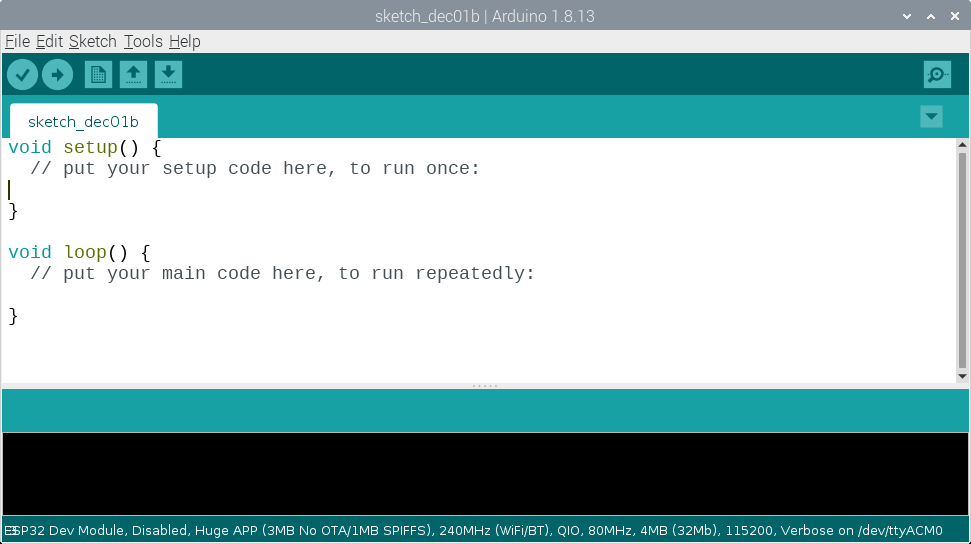
Step 3: What Kind of Target Board to Upload to?
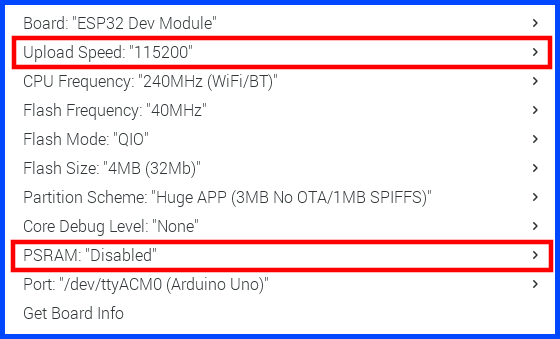
The M5Stack UNITCAM uses a ESP32-WROOM chip, so, we can use the "ESP32 Dev Module", with 2 observations to use it with UNITCAM:- Upload speed, choose 115200
- In "PSRAM", choose "disable" (NO PSRAM)
[pict target-board]
Or, if you prefer, add a new definition, something like the following to the file "boards.txt"..., then M5 UnitCam will appear on the target board menu...
On our Portable Mode IDE example, this file is located in:
arduino-1.8.13/hardware/espressif/esp32M5Stack-ESP32-UnitCam.name=M5StackUnitCam M5Stack-ESP32-UnitCam.upload.tool=esptool_py M5Stack-ESP32-UnitCam.upload.maximum_size=3145728 M5Stack-ESP32-UnitCam.upload.maximum_data_size=327680 M5Stack-ESP32-UnitCam.upload.flags= M5Stack-ESP32-UnitCam.upload.extra_flags= M5Stack-ESP32-UnitCam.upload.speed=115200 M5Stack-ESP32-UnitCam.serial.disableDTR=true M5Stack-ESP32-UnitCam.serial.disableRTS=true M5Stack-ESP32-UnitCam.build.tarch=xtensa M5Stack-ESP32-UnitCam.build.bootloader_addr=0x1000 M5Stack-ESP32-UnitCam.build.target=esp32 M5Stack-ESP32-UnitCam.build.mcu=esp32 M5Stack-ESP32-UnitCam.build.core=esp32 M5Stack-ESP32-UnitCam.build.variant=esp32 M5Stack-ESP32-UnitCam.build.board=ESP32_DEV M5Stack-ESP32-UnitCam.build.flash_size=4MB M5Stack-ESP32-UnitCam.build.partitions=huge_app M5Stack-ESP32-UnitCam.build.defines= M5Stack-ESP32-UnitCam.build.extra_libs= M5Stack-ESP32-UnitCam.build.code_debug=0 M5Stack-ESP32-UnitCam.menu.PSRAM.disabled=Disabled M5Stack-ESP32-UnitCam.menu.PSRAM.disabled.build.defines= M5Stack-ESP32-UnitCam.menu.PSRAM.disabled.build.extra_libs= M5Stack-ESP32-UnitCam.menu.PSRAM.enabled=Enabled M5Stack-ESP32-UnitCam.menu.PSRAM.enabled.build.defines=-DBOARD_HAS_PSRAM -mfix-esp32-psram-cache-issue -mfix-esp32-psram-cache-strategy=memw M5Stack-ESP32-UnitCam.menu.PSRAM.enabled.build.extra_libs= M5Stack-ESP32-UnitCam.menu.CPUFreq.240=240MHz (WiFi/BT) M5Stack-ESP32-UnitCam.menu.CPUFreq.240.build.f_cpu=240000000L M5Stack-ESP32-UnitCam.menu.CPUFreq.160=160MHz (WiFi/BT) M5Stack-ESP32-UnitCam.menu.CPUFreq.160.build.f_cpu=160000000L M5Stack-ESP32-UnitCam.menu.CPUFreq.80=80MHz (WiFi/BT) M5Stack-ESP32-UnitCam.menu.CPUFreq.80.build.f_cpu=80000000L M5Stack-ESP32-UnitCam.menu.CPUFreq.40=40MHz (40MHz XTAL) M5Stack-ESP32-UnitCam.menu.CPUFreq.40.build.f_cpu=40000000L M5Stack-ESP32-UnitCam.menu.CPUFreq.26=26MHz (26MHz XTAL) M5Stack-ESP32-UnitCam.menu.CPUFreq.26.build.f_cpu=26000000L M5Stack-ESP32-UnitCam.menu.CPUFreq.20=20MHz (40MHz XTAL) M5Stack-ESP32-UnitCam.menu.CPUFreq.20.build.f_cpu=20000000L M5Stack-ESP32-UnitCam.menu.CPUFreq.13=13MHz (26MHz XTAL) M5Stack-ESP32-UnitCam.menu.CPUFreq.13.build.f_cpu=13000000L M5Stack-ESP32-UnitCam.menu.CPUFreq.10=10MHz (40MHz XTAL) M5Stack-ESP32-UnitCam.menu.CPUFreq.10.build.f_cpu=10000000L M5Stack-ESP32-UnitCam.menu.FlashMode.qio=QIO M5Stack-ESP32-UnitCam.menu.FlashMode.qio.build.flash_mode=dio M5Stack-ESP32-UnitCam.menu.FlashMode.qio.build.boot=qio M5Stack-ESP32-UnitCam.menu.FlashMode.dio=DIO M5Stack-ESP32-UnitCam.menu.FlashMode.dio.build.flash_mode=dio M5Stack-ESP32-UnitCam.menu.FlashMode.dio.build.boot=dio M5Stack-ESP32-UnitCam.menu.FlashMode.qout=QOUT M5Stack-ESP32-UnitCam.menu.FlashMode.qout.build.flash_mode=dout M5Stack-ESP32-UnitCam.menu.FlashMode.qout.build.boot=qout M5Stack-ESP32-UnitCam.menu.FlashMode.dout=DOUT M5Stack-ESP32-UnitCam.menu.FlashMode.dout.build.flash_mode=dout M5Stack-ESP32-UnitCam.menu.FlashMode.dout.build.boot=dout M5Stack-ESP32-UnitCam.menu.FlashFreq.80=80MHz M5Stack-ESP32-UnitCam.menu.FlashFreq.80.build.flash_freq=80m M5Stack-ESP32-UnitCam.menu.FlashFreq.40=40MHz M5Stack-ESP32-UnitCam.menu.FlashFreq.40.build.flash_freq=40mIf you changed the "boards.txt" file, you need to restart the IDE...
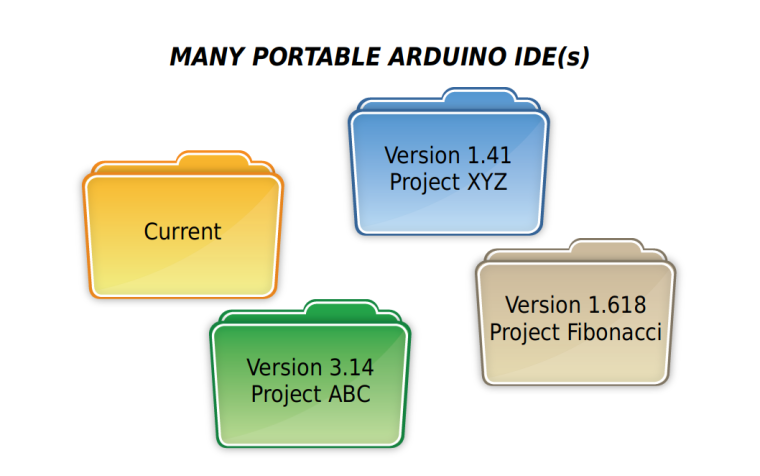
DONE, this is it!
[MANY arduino portable picture]
Step 4: running a sample
The UNITCAM does not have PSRAM, so it will NOT work with higher resolution images, but, for smaller resolutions it work OK...
A MINIMALIST PROOF OF CONCEPT DEMO (myCamSketch.ino)
The following code is a full/complete working demo Arduino Sketch.
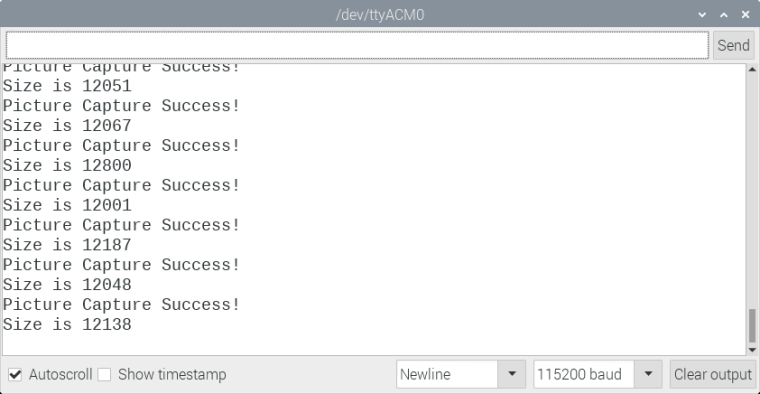
Or course, DOES NOT with current/latest (2021/DEC) version of the Arduino-Esp32 Framework, you need to install an old version, as described in this text above.The little demo only capture frames and show text messages (on the serial) of success and what is the size of the picture...
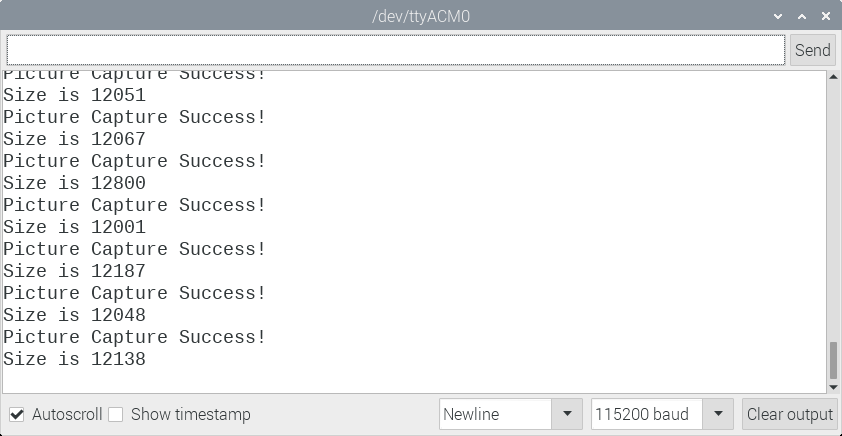
#include "esp_camera.h"

// Pin Map for M5Stack UnitCam
#define PWDN_GPIO_NUM     -1
#define RESET_GPIO_NUM    15
#define XCLK_GPIO_NUM     27
#define SIOD_GPIO_NUM     25
#define SIOC_GPIO_NUM     23

#define Y9_GPIO_NUM       19
#define Y8_GPIO_NUM       36
#define Y7_GPIO_NUM       18
#define Y6_GPIO_NUM       39
#define Y5_GPIO_NUM        5
#define Y4_GPIO_NUM       34
#define Y3_GPIO_NUM       35
#define Y2_GPIO_NUM       32

#define VSYNC_GPIO_NUM    22
#define HREF_GPIO_NUM     26
#define PCLK_GPIO_NUM     21

void setup() {
  Serial.begin(115200);
  Serial.println();

  camera_config_t config;
  config.ledc_channel = LEDC_CHANNEL_0;
  config.ledc_timer   = LEDC_TIMER_0;

  config.pin_d0 = Y2_GPIO_NUM;
  config.pin_d1 = Y3_GPIO_NUM;
  config.pin_d2 = Y4_GPIO_NUM;
  config.pin_d3 = Y5_GPIO_NUM;
  config.pin_d4 = Y6_GPIO_NUM;
  config.pin_d5 = Y7_GPIO_NUM;
  config.pin_d6 = Y8_GPIO_NUM;
  config.pin_d7 = Y9_GPIO_NUM;

  config.pin_xclk     = XCLK_GPIO_NUM;
  config.pin_pclk     = PCLK_GPIO_NUM;
  config.pin_vsync    = VSYNC_GPIO_NUM;
  config.pin_href     = HREF_GPIO_NUM;
  config.pin_sscb_sda = SIOD_GPIO_NUM;
  config.pin_sscb_scl = SIOC_GPIO_NUM;
  config.pin_pwdn     = PWDN_GPIO_NUM;
  config.pin_reset    = RESET_GPIO_NUM;
  config.xclk_freq_hz = 20000000;

  config.pixel_format = PIXFORMAT_JPEG;
  config.jpeg_quality = 20;

  config.frame_size   = FRAMESIZE_CIF;

  config.fb_count = 1;

  // Initialize the Camera
  esp_err_t err = esp_camera_init(&config);
  if (err != ESP_OK) {
    Serial.printf("Camera Initialization Fail. Error 0x%x", err);
    return;
  }
}

void loop() {
  camera_fb_t * fb = NULL;

  while (true) {
    // Wait 5 Seconds before "take" picture
    delay(5000);

    // "Take" a Picture
    fb = esp_camera_fb_get();

    if (!fb) {
      Serial.println("Camera ERROR, unable to capture...");
      return;
    }

    Serial.println("Picture Capture Success!");
    Serial.printf("Size is %d \n", fb->len);

    esp_camera_fb_return(fb);
  }
}
Here is the output:
[picture serial output]
It is nice to see that, for frames JPEG, it is also possible to get XGA, 1024x768 resolution...
My M5 account here is new, I do not have permission to upload zip files, so will upload a more complete demo/sample to GitHub... one that allow us to see the image that was captured... I will post here later the URL...
[MY Motivation]
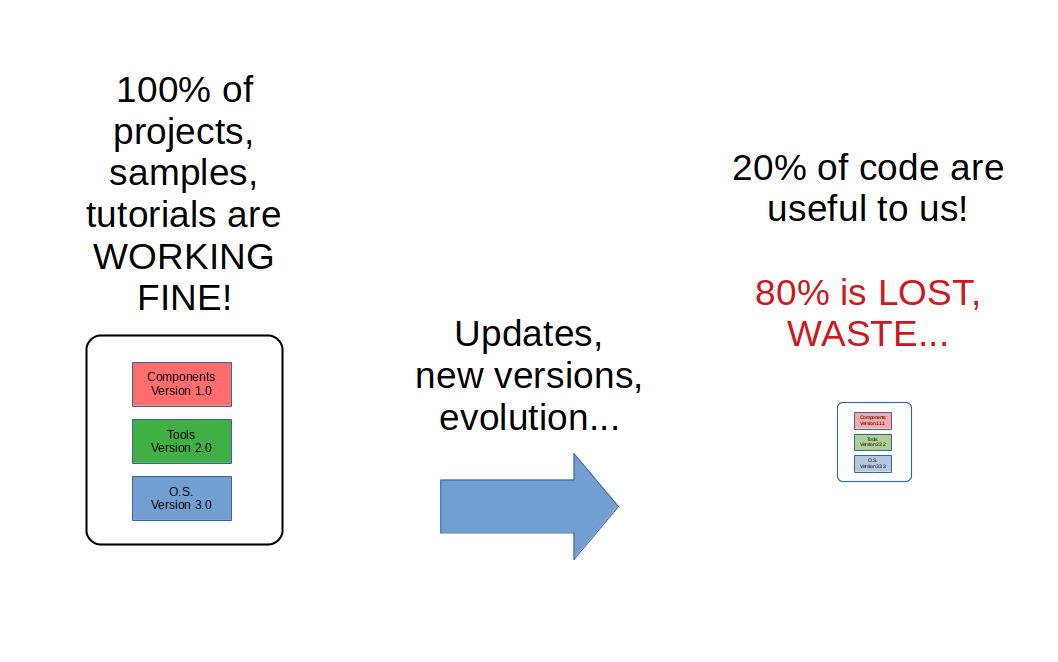
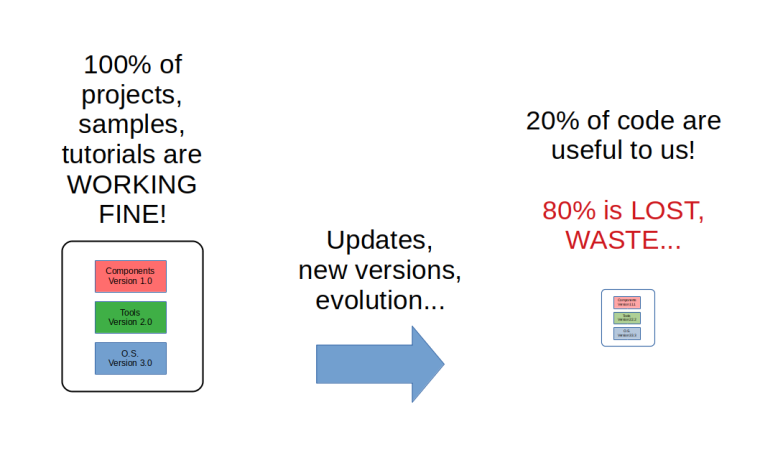
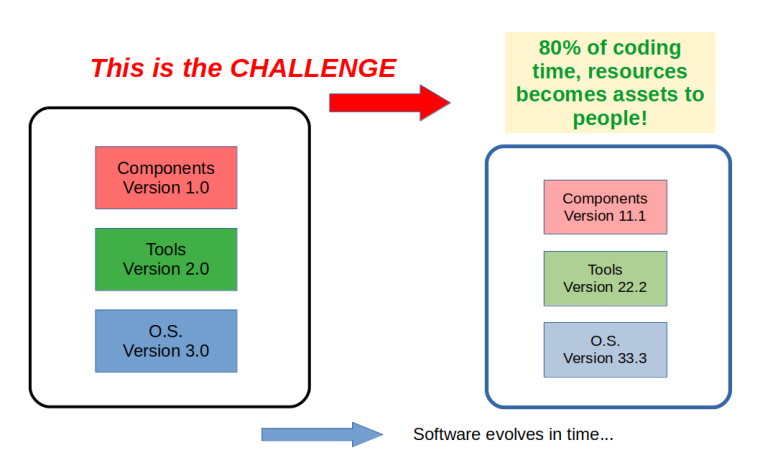
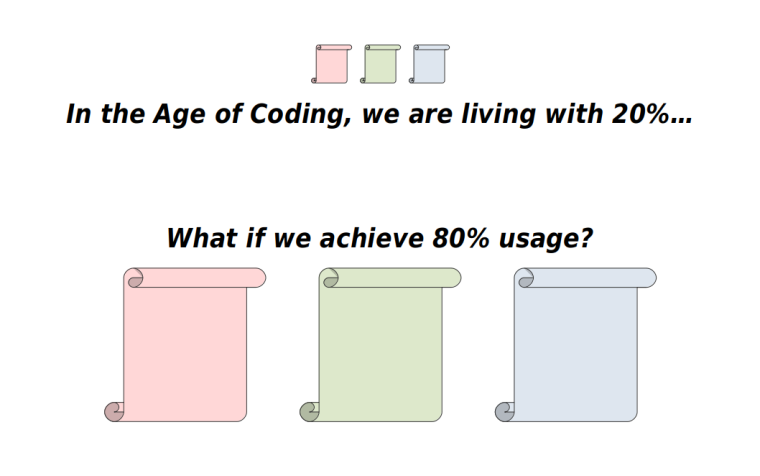
What motivates me to have done this post and the other about the ESP-IDF (using many different versions of code), goes far beyond the camera, wifi and ESP32 devices... the basic ideas touched here relating to using different versions of source code APPLIES TO EVERYTHING IN SOFTWARE, and having a little practical understanding of the subject is a knowledge worth spending time to get...If we use "language from statistics", from all the RICH SET of tutorials, sample code, and software projects that works, we end up benefiting ONLY from about 20%, and the remaining 80% are, for some reason, not able to work in the set of tools, hardware and setups that individualy we have at our hands...
Every individual or team, when building a software project, a tutorial/sample, is using some specific versions of software libraries, specific versions of tools and specific versions of operating systems, etc... when we try to use such code/project/sample with different set of libs, tools and OSes, not always thing works as expected...
In fact, I think that we can use the 80/20 Principle here, in reference, a kind of analogy/approximation, and say that we are all using ONLY 20% of code (project, samples, tutorials), when, the true potential is somewhere around 80% (100% will be difficult to achieve)...
My point here is that, some of the reasons (factors) for the "20%" are known to us, and there are things we can do about it... so, we can walk towards the "80%"... and, at least some part of "these some reasons" are relative easy to deal with...
[picts]


Ok, combined, the 2 posts became sizeble, but, it is really what I was motivated to write about...
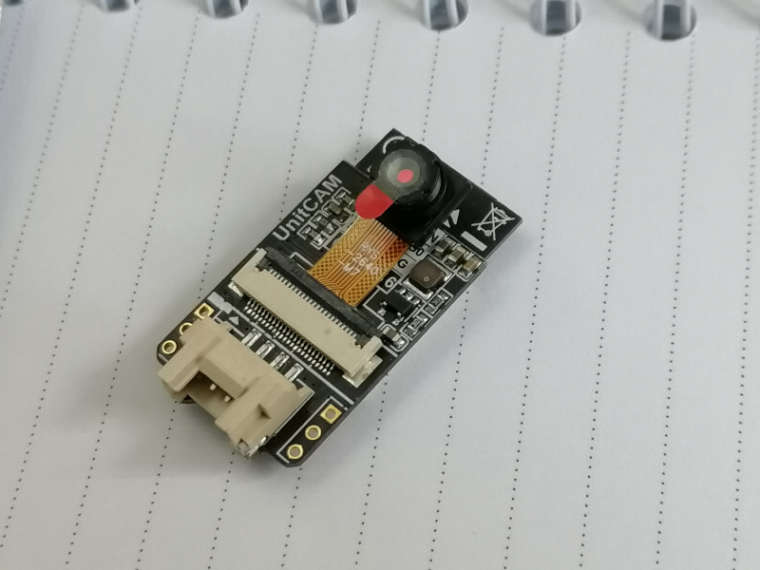
Also, I just want to say that this little M5Stack UnitCam fullfil my expectations, it is very simple, cheap, and deliver what I expected from it... nice.About a month ago I got my 2 first M5 products: UnitCam and ESP32-C3 Mate, and decide to start with the UnitCam... also, it was my first attempt to work with camera devices on ESP32... and, because of the little bug, I was kind of "lost" in the first few attempts (with Arduino IDE)...
Since M5 Company is more focused on the UIFlow Programming Environment, people that want to use Arduino or IDF have less doc material to start with...
I found MANY tutos/samples regarding esp32-cam devices, but, FOUND NONE showing the M5-UnitCam working with Arduino IDE or ESP-IDF, with source code available and a clear statement that it is done in such and such way...So, I end up doing these 2 text/post... including the more broader category inside which the issue falls, relating to the complexity of using different versions of software that are mode of different versions of soft-components...
Lots of text, maybe there is some typo or bad statement somewhere, if you find some, tell me so that I can correct them...
M5-UnitCam is a cool device, using UIFlow, ArduinoIDE and ESP-IDF should unleash its great value...
Hope this help other UnitCam users.
Regards all,
Valter
2021/DEC/04
JapanAbout the Development System: RaspberryPI 4 / 4GB RAM LINUX KERNEL (32Bit): Linux raspberrypi 5.10.63-v7l+ #1459 SMP Wed Oct 6 16:41:57 BST 2021 armv7l GNU/Linux OS NAME="Raspbian GNU/Linux" OS VERSION="10 (buster)" Arduino IDE v1.8.13 (ARM 32Bits) Using old Arduino-esp32 commit (version of 2021/FEB/22) -
Just to clarify better the model of device I am talking/doing here...
Valter
Hello! It looks like you're interested in this conversation, but you don't have an account yet.
Getting fed up of having to scroll through the same posts each visit? When you register for an account, you'll always come back to exactly where you were before, and choose to be notified of new replies (either via email, or push notification). You'll also be able to save bookmarks and upvote posts to show your appreciation to other community members.
With your input, this post could be even better 💗
Register Login