🤖Have you ever tried Chat.M5Stack.com before asking??😎
  • Issue with m5dial and Unit 4Relay

    3
    1
    0 Votes
    3 Posts
    424 Views
    P
    @robski Yes it happens only when relay is called to be on not in standby Unit 4relay is connected to Port A with his supply(5V), but I using +24vdc for supplied m5dial
  • How to initialize Speaker on Dial_v1.1

    1
    0 Votes
    1 Posts
    278 Views
    No one has replied
  • How can i convert .m5f2 file to .bin?

    1
    0 Votes
    1 Posts
    174 Views
    No one has replied
  • problem after flashing uiflow2 on cardputer

    1
    0 Votes
    1 Posts
    427 Views
    No one has replied
  • Help with UNIT IR and NanoC6 in Uiflow2

    6
    0 Votes
    6 Posts
    2k Views
    V
    Updating the Timer() was in fact the primary issue. The code has already been updated upstream to handle this. Importing the latest version would allow changing the timer setting. I've created a bug/PR for it. After resolving this, the next hurdle is that UIFlow2 currently only handles one IR protocol ("NEC"). If your systems use a different protocol, you'll have to import it from the upstream repo. If your device uses an unsupported protocol, you'll have to hack together a raw handler as described here.
  • Is this possible with the M5 products?

    6
    1
    0 Votes
    6 Posts
    2k Views
    RIDDSprojectsR
    @jobbike I understand your choice of certain components. I'd like to point out the existence of this cable: https://shop.m5stack.com/products/grove-y-cable-20cm-5pcs, and there may be better options available. Perhaps this display is a worthwhile consideration: https://shop.m5stack.com/products/red-7-segment-digit-clock-unit. It's possible to simply send a number to the display, which will then be displayed. The libraries are automatically loaded when you select the modules, making programming very easy. When using this display, a Y-cable is unnecessary, as it has an output connector for the load cell. It's also worth mentioning that the buzzer, along with the buttons, must be connected to a separate port and cannot use the port that sends I2C signals. Unless these also use I2C, in which case you can connect it as indicated in your sketch (with or without a Pb hub). Automatically translated from Dutch: Ik snap je keuze voor bepaalde componenten. Graag attendeer ik je op het bestaan van deze kabel: https://shop.m5stack.com/products/grove-y-cable-20cm-5pcs en mogelijk zijn er betere opties verkrijgbaar. Misschien is dit display een waardevolle overweging: https://shop.m5stack.com/products/red-7-segment-digit-clock-unit Het is mogelijk om gewoon een getal naar het display te verzenden welke vervolgens getoond wordt. De libraries worden automatisch geladen bij het selecteren van de modules en maakt het programmeren heel eenvoudig. Bij het gebruik van dit display is een Y-kabel overbodig gezien dit display een uitgangsconnector heeft waar de load cell op aangesloten kan worden. Misschien nog het vermelden waard: De buzzer moet samen met de knoppen op een aparte poort en kan geen gebruikmaken van de poort welke I2C signalen verstuurt. Tenzij deze ook van I2C gebruik maken en kan je dan aansluiten zoals je in je schets hebt aangegeven (met of zonder Pb hub).
  • GPIO rising/falling events

    3
    0 Votes
    3 Posts
    2k Views
    felmueF
    Hi guys while there doesn't seem to be a Pin Interrupt block you can just put some code into an Execute mpy code block. I created an example showing interrupts use on Pins. You can find it in the UIFlow Project Zone called: M5AtomS3_GPIO_Interrupt_UIFlow2.4.0 Thanks Felix
  • Core S3 m5ui/port.py callback error

    1
    1 Votes
    1 Posts
    584 Views
    No one has replied
  • UIFlow2.0 Exit to main after program load

    1
    1 Votes
    1 Posts
    379 Views
    No one has replied
  • MQTT SUbscribe is not working, after a few

    2
    2
    1 Votes
    2 Posts
    698 Views
    F
    So, because nobody cares - and the M5Stack might be abadoned by the company - here the solution - found it by myself.... 
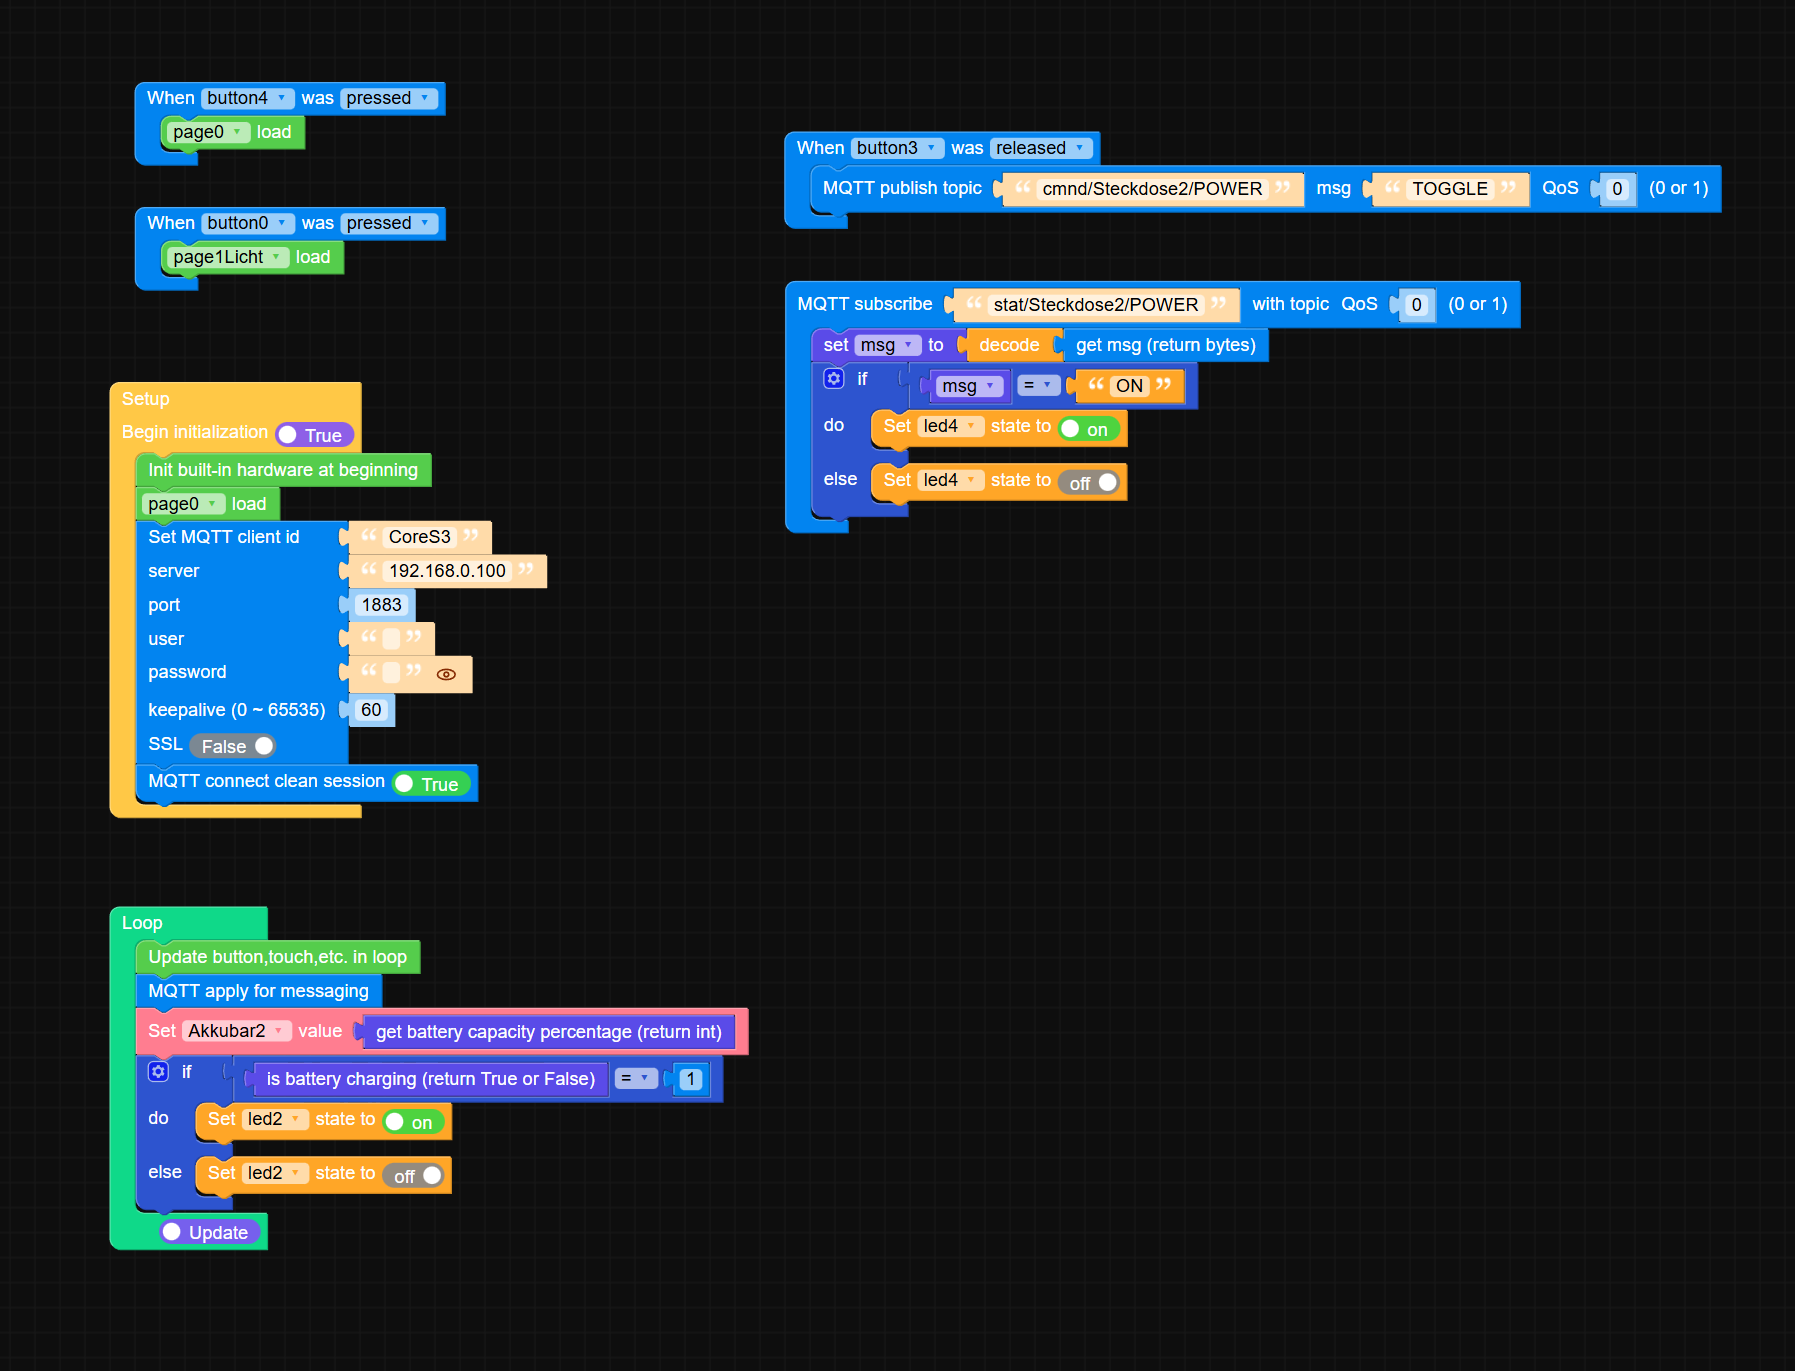
The Blockly is doing crap - and cant be fixed in there, u have to learn micropython...i asked a friend - and he had the following solution: import os, sys, io import M5 from M5 import * import m5ui import lvgl as lv from umqtt import MQTTClient import time page0 = None page1Licht = None button0 = None button1 = None Akkubar2 = None led0 = None led2 = None charge = None button2 = None button3 = None led3 = None led4 = None button4 = None mqtt_client = None msg = None last_ui_update = 0 # <---- UI Timing # ---------- MQTT EVENTS ---------- def mqtt_stat_Steckdose2_POWER_event(data): global led4, msg msg = (data[1]).decode() led4.on() if msg == 'ON' else led4.off() print("Steckdose2:", msg) def mqtt_stat_Steckdose1_POWER_event(data): global led3, msg msg = (data[1]).decode() led3.on() if msg == 'ON' else led3.off() print("Steckdose1:", msg) # ---------- MQTT CONNECT / RECONNECT ---------- def mqtt_connect(): global mqtt_client print("MQTT connecting...") try: mqtt_client = MQTTClient('CoreS3', '192.168.0.100', port=1883, user='', password='', keepalive=60) mqtt_client.connect(clean_session=False) mqtt_client.subscribe('stat/Steckdose2/POWER', mqtt_stat_Steckdose2_POWER_event, qos=0) mqtt_client.subscribe('stat/Steckdose1/POWER', mqtt_stat_Steckdose1_POWER_event, qos=0) print("MQTT connected & subscribed.") time.sleep(0.2) except Exception as e: print("MQTT connect failed:", e) time.sleep(2) # ---------- BUTTON EVENTS ---------- def button4_pressed_event(event_struct): page0.screen_load() def button0_pressed_event(event_struct): page1Licht.screen_load() def button3_released_event(event_struct): mqtt_client.publish('cmnd/Steckdose2/POWER', 'TOGGLE', qos=0) def button2_released_event(event_struct): mqtt_client.publish('cmnd/Steckdose1/POWER', 'TOGGLE', qos=0) # ---------- UI EVENT HANDLER ---------- def button4_event_handler(event_struct): if event_struct.code == lv.EVENT.PRESSED: button4_pressed_event(event_struct) def button0_event_handler(event_struct): if event_struct.code == lv.EVENT.PRESSED: button0_pressed_event(event_struct) def button3_event_handler(event_struct): if event_struct.code == lv.EVENT.RELEASED: button3_released_event(event_struct) def button2_event_handler(event_struct): if event_struct.code == lv.EVENT.RELEASED: button2_released_event(event_struct) # ---------- SETUP ---------- def setup(): global page0, page1Licht, button0, button1, Akkubar2, led0, led2, charge, button2, button3, led3, led4, button4 M5.begin() Widgets.setRotation(1) m5ui.init() page0 = m5ui.M5Page(bg_c=0x000000) page1Licht = m5ui.M5Page(bg_c=0x000000) button0 = m5ui.M5Button(text="Licht", x=114, y=23, bg_c=0x2196f3, text_c=0xffffff, font=lv.font_montserrat_24, parent=page0) button1 = m5ui.M5Button(text="Automation", x=71, y=137, bg_c=0x2196f3, text_c=0xffffff, font=lv.font_montserrat_24, parent=page0) Akkubar2 = m5ui.M5Bar(x=4, y=220, w=100, h=13, min_value=0, max_value=100, value=25, bg_c=0x2193f3, color=0x21f326, parent=page1Licht) led0 = m5ui.M5LED(x=7, y=187, size=20, color=0x00ff00, on=True, parent=page1Licht) led2 = m5ui.M5LED(x=297, y=215, size=20, color=0x00ff00, on=True, parent=page0) charge = m5ui.M5Label("CHAR", x=248, y=217, text_c=0xffffff, bg_c=0xffffff, bg_opa=0, font=lv.font_montserrat_14, parent=page0) button2 = m5ui.M5Button(text="Steckdose 1 (PC)", x=12, y=9, bg_c=0x2196f3, text_c=0xffffff, font=lv.font_montserrat_24, parent=page1Licht) button3 = m5ui.M5Button(text="Steckdose 2", x=14, y=78, bg_c=0x2196f3, text_c=0xffffff, font=lv.font_montserrat_24, parent=page1Licht) led3 = m5ui.M5LED(x=263, y=10, size=44, color=0x00ff00, on=True, parent=page1Licht) led4 = m5ui.M5LED(x=263, y=78, size=44, color=0x00ff00, on=True, parent=page1Licht) button4 = m5ui.M5Button(text="Back", x=227, y=196, bg_c=0x2196f3, text_c=0xffffff, font=lv.font_montserrat_24, parent=page1Licht) button4.add_event_cb(button4_event_handler, lv.EVENT.ALL, None) button0.add_event_cb(button0_event_handler, lv.EVENT.ALL, None) button3.add_event_cb(button3_event_handler, lv.EVENT.ALL, None) button2.add_event_cb(button2_event_handler, lv.EVENT.ALL, None) page0.screen_load() mqtt_connect() Power.setChargeCurrent(1000) Power.setChargeVoltage(4100) # ---------- LOOP ---------- def loop(): global last_ui_update # ---- MQTT schnell abfragen -> verhindert Verzögerungen for _ in range(5): try: mqtt_client.check_msg() except: mqtt_connect() if not mqtt_client.isconnected(): mqtt_connect() # ---- UI nur alle 100ms aktualisieren (entkoppelt) now = time.ticks_ms() if time.ticks_diff(now, last_ui_update) > 100: last_ui_update = now M5.update() Akkubar2.set_value(Power.getBatteryLevel(), True) led2.on() if Power.isCharging() else led2.off() led0.on() if mqtt_client.isconnected() else led0.off() # ---------- MAIN ---------- if __name__ == '__main__': try: setup() while True: loop() except (Exception, KeyboardInterrupt) as e: try: m5ui.deinit() from utility import print_error_msg print_error_msg(e) except ImportError: print("please update to latest firmware") 
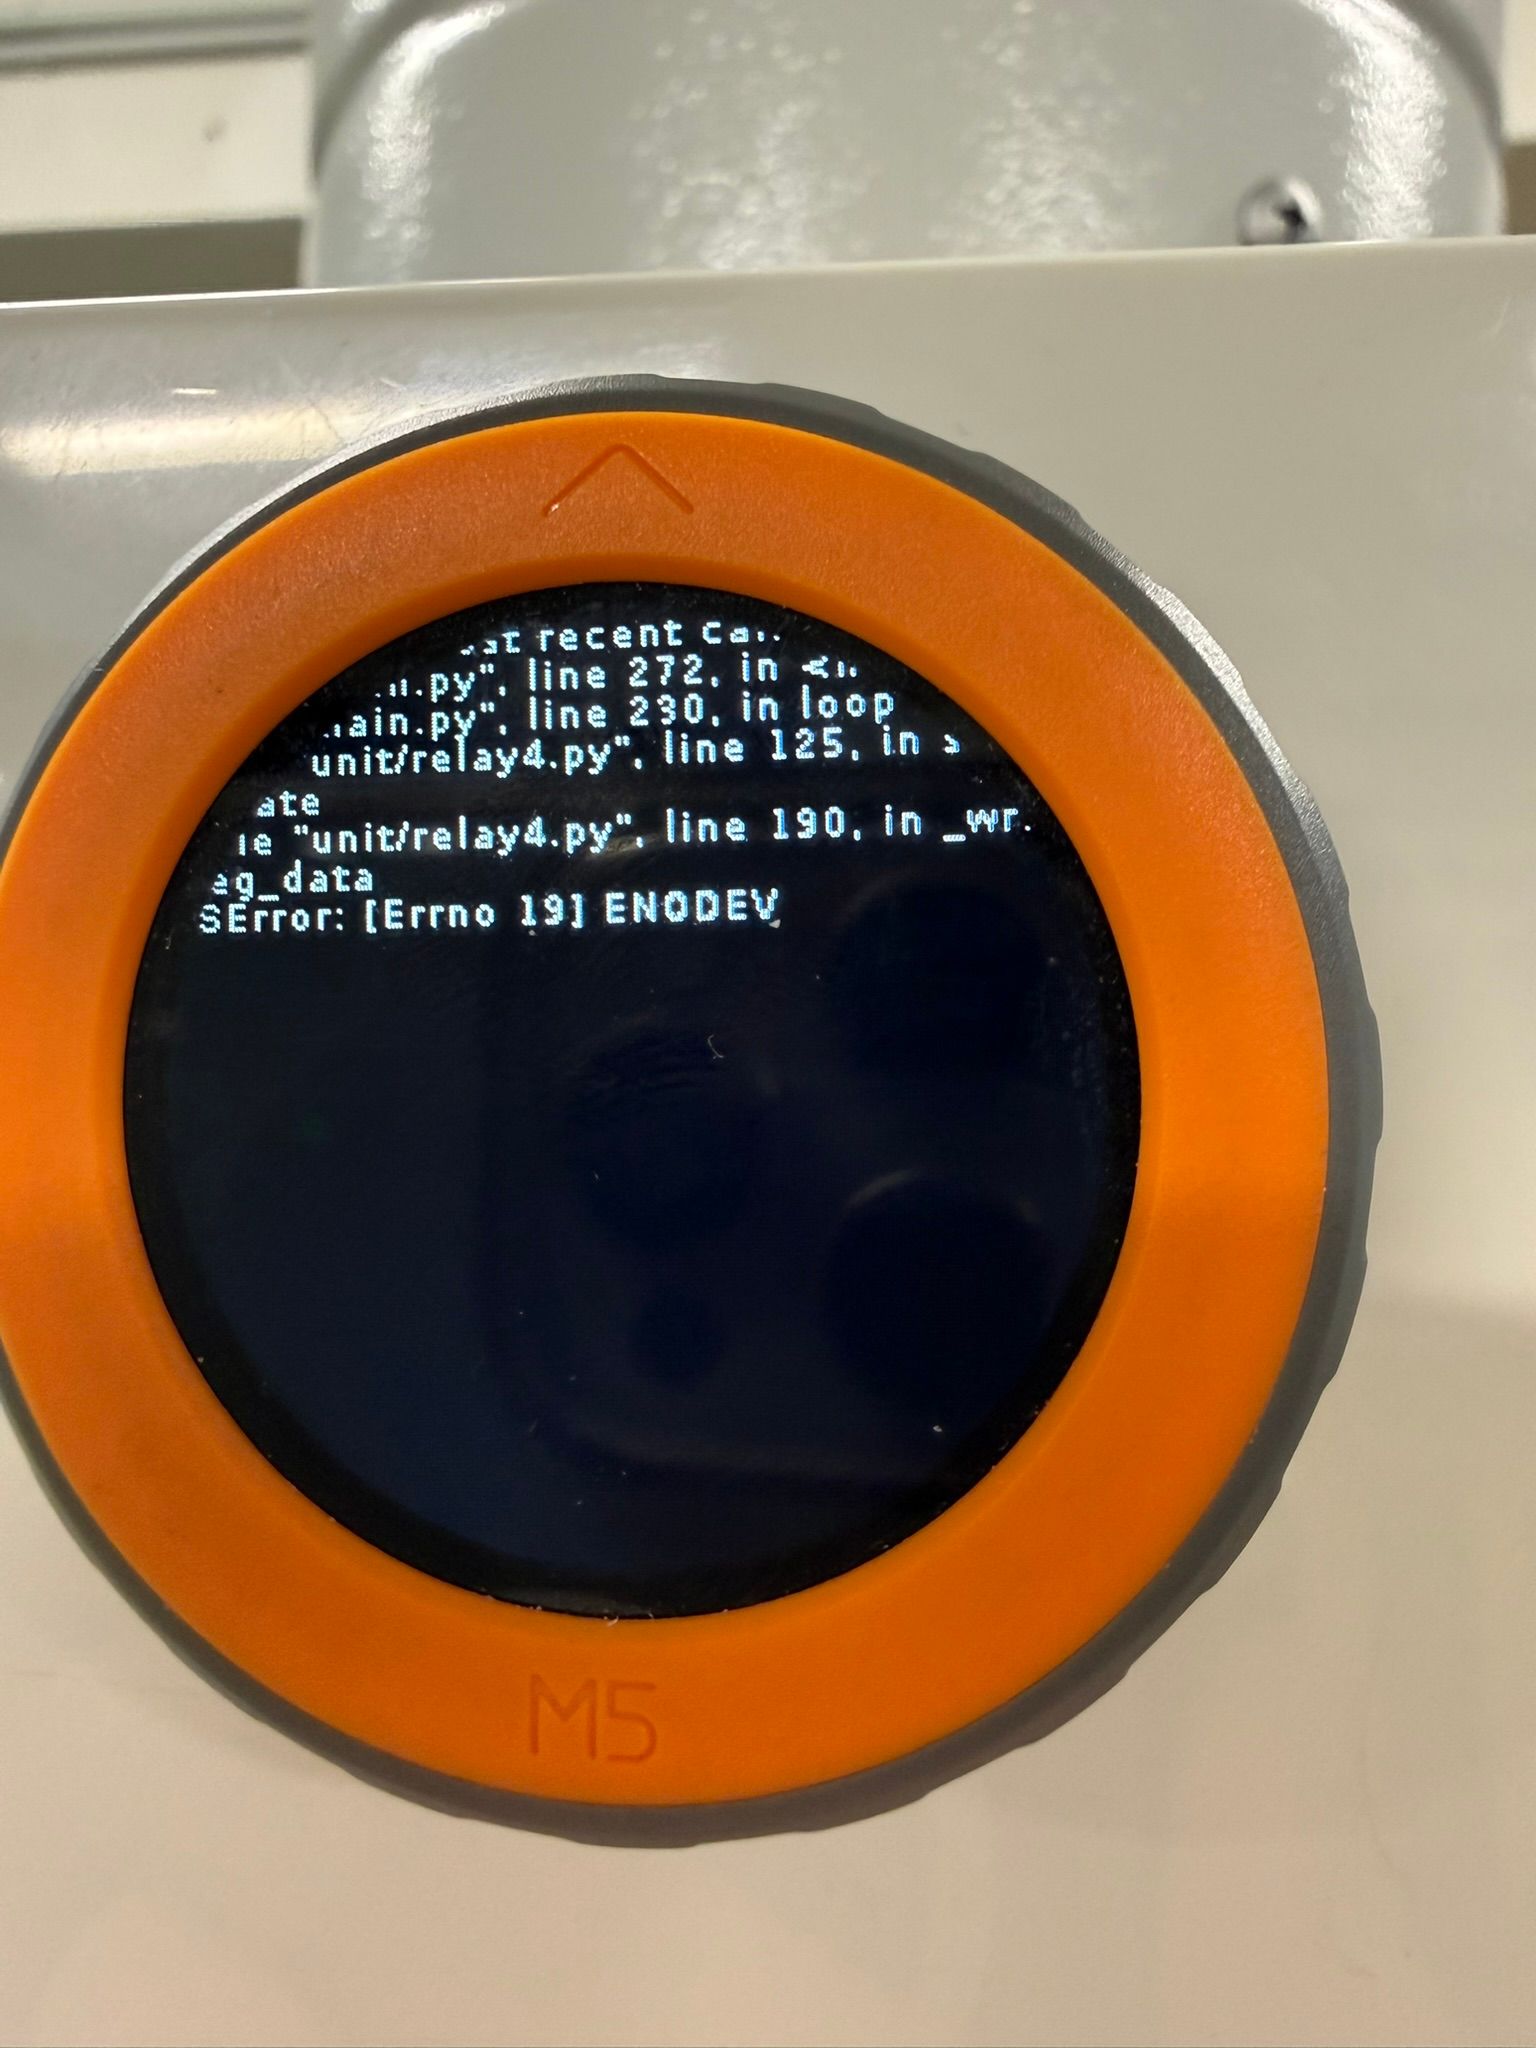
That is working instant, and over a long time. the led indicator switches instant and real. The issue is, that the LVGL render takes so long, that the subscribed message dont come trough. its a bug in the blockly implementation, but it never gets fixed, because it seems, the M5Stack is abadoned....so u have to fix it in the mircopython code - and never get back to blockly - or u loose the code ^^
  • Port A power

    10
    0 Votes
    10 Posts
    3k Views
    R
    @RPI25 It's fine. I have a Core S3 now so I don't need to use my Core 2 so much. Thanks for trying, RPi
  • UiFlow 2.1.3 Web app export to .py for use on CoreS3

    6
    0 Votes
    6 Posts
    4k Views
    R
    @sssouthpaw Yes I think the only way to do it is to copy the python file and then paste it into Thonny or VSCode before uploading through the file manager in the UIFlow terminal to get the python file on the device.
  • UIFLOW V2.3.9

    uiflow2
    4
    0 Votes
    4 Posts
    1k Views
    R
    If you feel like the canvas method is too much effort - especially if it part of a larger project or you prefer M5GFX - then here is a working switch in M5GFX: import os, sys, io import M5 from M5 import * import time Switch1 = None Switch2 = None Switch3 = None Knob = None state = None touch = None # Describe this function... def Off(): global state, touch, Switch1, Switch2, Switch3, Knob state = 0 Knob.setCursor(x=145, y=119) Switch1.setColor(color=0x999999, fill_c=0x999999) Switch2.setColor(color=0x999999, fill_c=0x999999) Knob.setColor(color=0xffffff, fill_c=0xffffff) # Describe this function... def On(): global state, touch, Switch1, Switch2, Switch3, Knob state = 1 Knob.setCursor(x=174, y=119) Switch2.setColor(color=0x33ccff, fill_c=0x33ccff) Switch3.setColor(color=0x33ccff, fill_c=0x33ccff) Knob.setColor(color=0xffffff, fill_c=0xffffff) def setup(): global Switch1, Switch2, Switch3, Knob, state, touch M5.begin() Widgets.setRotation(1) Widgets.fillScreen(0x222222) Switch1 = Widgets.Circle(174, 119, 14, 0xa4a4a4, 0xa4a4a4) Switch2 = Widgets.Rectangle(145, 105, 28, 28, 0xa4a4a4, 0xa4a4a4) Switch3 = Widgets.Circle(145, 119, 14, 0xa4a4a4, 0xa4a4a4) Knob = Widgets.Circle(145, 119, 14, 0xffffff, 0xffffff) Off() def loop(): global Switch1, Switch2, Switch3, Knob, state, touch M5.update() touch = M5.Touch.getCount() if touch != 0: if (M5.Touch.getX()) >= 131 and (M5.Touch.getX()) <= 188 and (M5.Touch.getY()) >= 105 and (M5.Touch.getY()) <= 133: if state == 0: On() else: Off() time.sleep_ms(500) if __name__ == '__main__': try: setup() while True: loop() except (Exception, KeyboardInterrupt) as e: try: from utility import print_error_msg print_error_msg(e) except ImportError: print("please update to latest firmware")
  • URGENT - UIFlow 2 firmware 2.4.0 dated 12/22/25 (today) not working

    3
    0 Votes
    3 Posts
    997 Views
    F
    Hi Everything has been restored with correct working versions, same 2.4.0 numbering firmware but different dates, 12/23/25 and 12/24/25 depending of device... Thanks a lot for correcting, especially this end of year, but anyway, it would have been nice that those corrections were notified in the current post by m5stack instead of querying by days about it through m5burner, just a piece of advice for future :) Enjoy end of year festivities and Merry Christmas!!!
  • Flow 2 Execute block

    9
    0 Votes
    9 Posts
    5k Views
    felmueF
    Hello @ProfHuster yes, that is what I observed too. As long as edit mode in Python code window is enabled, changes on the blockly side get ignored. (I guess that's to prevent changes from being overwritten.) Thanks Felix
  • Better response time using "Pin Button"

    1
    2
    0 Votes
    1 Posts
    473 Views
    No one has replied
  • UIFlow v2.3.8 does not save Spinbox current value and decimal places

    1
    0 Votes
    1 Posts
    453 Views
    No one has replied
  • I2C issues on the TAB5

    4
    0 Votes
    4 Posts
    1k Views
    B
    @BR123456 Problem solved. See: https://community.m5stack.com/post/30264
  • Use Project on different device / how to switch hardware

    2
    0 Votes
    2 Posts
    674 Views
    B
    @Rusticus42 Hi, You didn't find because there is no formal way to do that. This is in order to protect your hardware from conflicts. If you switch hardware and stay with the previous code, pin allocations, I2C addresses etc. will probably be wrong and will have conflicts that might cause damage. What you can do if you feel responsible enough is to export your project to a file on your hard disk, open it in a text editor and change the "type" parameter to your new hardware type (keep the name in lower caps). [image: 1764678949913-b35f2ded-e0e7-46b2-823c-21ce8b9a34c9-image.png] In this example it is tab5. If you change for example to Core2, replace the "tab5" by "core2", then save the file and import it from the Uiflow2 ide. Again, you should go thoroughly over your code before running the code and fix all hardware related commands. Do this at your own risk!
  • UiFlow2 M5UI Menu - ONLY switch events?

    1
    0 Votes
    1 Posts
    479 Views
    No one has replied